In the previous post I've presented a general overview of the Pigo face detection library I'm working on, some examples of how you can run it on various platforms and environment for detecting faces and also its desired scope in the Go ecosystem. Meantime the library got a huge revamp and reached a new milestone in the development live cycle, which means as of today Pigo is capable of pupils/eyes localization and even better supports facial landmark points detection. In this article I will focus on the pupils/eyes detection, following that in the next article aiming to discuss about the facial landmark points detection. So let's get started.
Pupils/eyes localization
The implementation is based on the Eye pupil localization with an ensemble of randomized trees paper, which pretty much resembles with the method used on face detection but with few remarkable differences. I will explain them shortly. Both of the implementations are based on tree ensembles, well known for achieving impressive results, in contrary to a single tree detection method. This means that the classifier used for the pupil/eyes detection is generated based on decision trees and the training data is recursively clustered in this fashion until some termination condition is met.
Since we know the leaf structure of the binary classifier the only thing we need to do is to decompose it in order to obtain the data structure. The decomposition procedure is based on the following steps:
- Read the depth (size) of each tree and write it into the buffer array.
- Get the number of stages as 32-bit unsigned integers and write it into the buffer array.
- Obtain the scale multiplier (applied after each stage) and write it into the buffer array.
- Obtain the number of trees per stage and write it into the buffer array.
- Obtain the depth of each tree and write it into the buffer array.
- Traverse all the stages of the binary tree, traverse all the branches of each stage and read prediction from tree's leaf nodes.
The returned element should be a struct containing all of the above information.
There is a problem though: the output of the regression trees might be noisy and unreliable in some special cases like when we are feeding some low quality video frames or images. This is the reason why the method introduces a random perturbation factor during runtime to outweigh the false positive rates on detection. Later on, after the detected face region is classified we sort the perturbations in ascendant order and retrieve the median value of the resulted vector.
The classification procedure consists in the following: traverse the trees on all the stages and use almost the same binary test applied on the face classification procedure. We have to restrict the pupils/eyes classification method exclusive to the detected face region. In the end we will obtain the pupils coordinates and a scale factor. The scale factor is less important in this case, since it's useful only if we wish to give a different size for the detected pupils.
We are using the same method for left and right eye detection, the only difference is that for the right eye detection we flip the sign in the following formula.
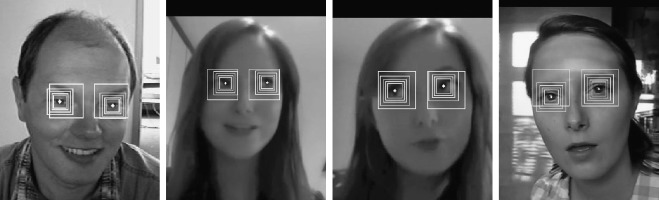
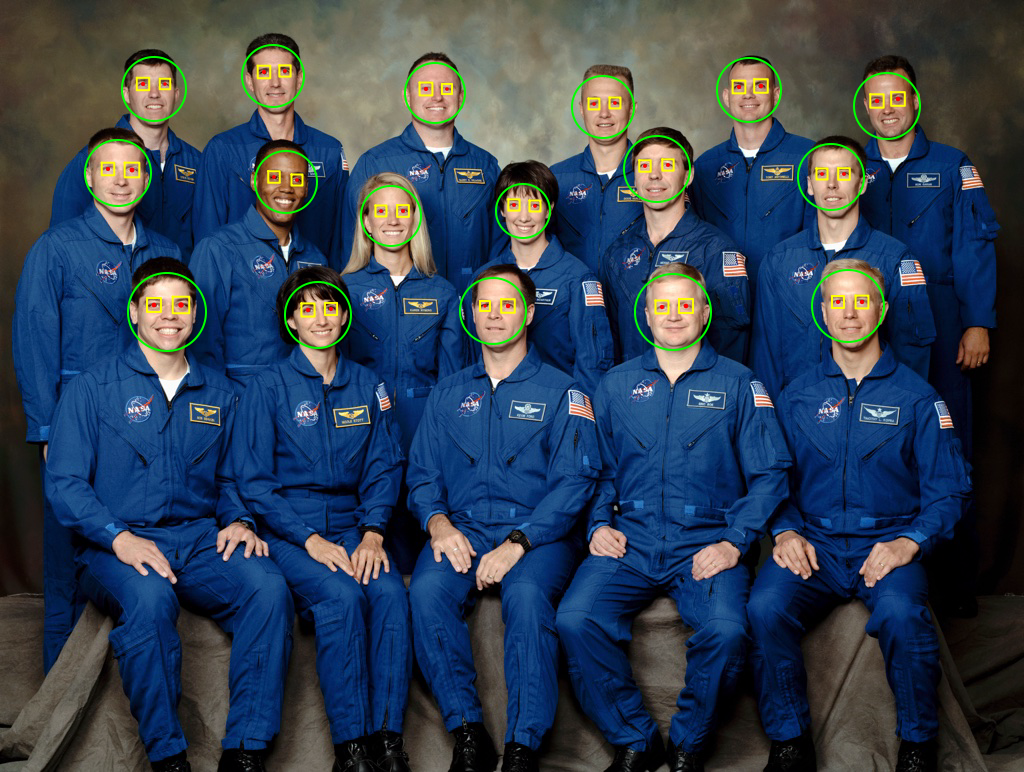
To run it on static images a CLI application is bundled into the library. The difference from the face detection is that in addition we have to provide the binary classifier for pupil/eyes detection. Since the library is constructed in a modular fashion, this means that only certain sections needs to be extended like the binary parser and the classification function. Other parts of the code remains pretty much unchanged.
This is how the end result looks like:
Webcam demo
I have also created a webcam demo running in Python, since as of today there isn't a native Go webcam library supported on all platforms. The major takeaway is that the computational (the face and pupils detection) part is executed in Go and the resulted data (the detection coordinates) are transferred to Python through a shared object library.
It sounds like an alchemy, but it's definitely a working solution. On the Go part there are a few things we need to take care.
- The exported function should be annotated with the //export
statement . - The source must import the pseudo C package.
- An empty main function should be declared.
- The package must be a main package.
These are only the technical requirements imposed by the language in order to transfer the Go code as a shared object. Afterwards we can build the program with the following commands (in fact these will be executed from the Python code).
To communicate with the Go code from the Python code base we will use the Ctype library. This is a handy library which provides C compatible data types, and allows calling functions in DLLs or shared libraries. Using the library at first might be intimidating since it heavily relies on the C structs and types. Also accessing the Go data is possible exclusively through pointer interfaces. This means we need to be aware about the data type, the buffer length and the maximum capacity of the transferred Go slice. In fact the slice will be a pointer pointing to a data structure. In Python we have to declare a class which maps to a C type struct having the following components:
On the other hand at the Go counterpart after running the detection function and retrieving the coordinate results we need to convert them as one dimensional array, since in Go is not possible transfer a 2D array over an array pointer. The trick is to convert the 2D array (since we are dealing with multiple face detection and by default multiple pupils/eyes detection) to a 1D array in such a way to delimit the detection groups from each other. One efficient way to make this happen is to introduce as a first slice element the number of detected faces. Since we know how many faces are detected, later on in the Python part we can transform the array with the help of numpy to the desired shape.
This is how the Go code looks like. We are invoking the runtime.KeepAlive(coords) function to make sure the coords is not freed up by the garbage collector prematurely.
In the end we should obtain something like below, where the first value represent the number of the detected faces and the rest of the values are the x and y coordinates and the scale factor of the detected faces, respectively pupils.
[2 0 0 0 0 272 297 213 41 1 248 258 27 41 0 248 341 27 41 0 238 599 72 25 1 230 587 9 25 0 233 616 9 25 0]
Back to Python. We are capturing each frame from the webcam and transferring the underlying binary data to Go as a byte array. After running the face detector over the obtained binary data we are retrieving back the obtained one dimensional array. Ctypes requires to define a class which must contains a _field_ attribute. This attribute must be a list of 2-tuples, containing a field name and a field type. Since the Go slice has a len and a cap attribute we will define them as the tuple elements. Once we've defined the base class we also have to define the argument types. The argument type will be the base class and the return type will be a pointer type, represented as integer exactly as the Go return type.
Since in Ctypes we are dealing with pointer values, this means we do not have any information about the allocated buffer size needed by the face detector, this is the reason why we are allocating a buffer just enough to hold all the values returned by the detector. Later on we'll trim the buffer length by emptying the null values. We can do this because we already know the number of detected faces. So the end results will be the number of detected faces multiplied by 3, since each face detection result should be extended with a pair of pupil detection.
And that's all. Below is a video capture of running the face detector in real time. The small lagging is due to time needed to convert the Go code to a shared library, otherwise the algorithm can produce much higher frame rates.
Pigo, the Go face detection library now supports pupil/eyes localization.? There are still more to come! #golang #MachineLearning https://t.co/JTEZp9fdem pic.twitter.com/eNHydt2ZCL
— Endre Simo (@simo_endre) August 9, 2019
I hope that you enjoyed reading this article and got a better understanding of the interaction between Go and Python. In the next article I'll present a concrete example using this feature. If you appreciate the work done on this library please show your support by staring the library Github repository here: https://github.com/esimov/pigo.