Pigo's cute logo
Pigo is a pure face detection library implemented in and for Go and it is based on Pixel Intensity Comparison-based Object detection paper (https://arxiv.org/pdf/1305.4537.pdf). Pigo has been around for more than a year, but I haven’t published a technical article about the library, so I thought it was time to fill in the gap.
Technical overview
The first and foremost question: what was the motivation and the purpose of making this library, since GoCV does exists from a quite a long time in the Go ecosystem and is trying to be the perfect toolset for everyone who is willing to combine the simplicity of the Go language with the comprehensiveness of OpenCV in everything related to computer vision, machine learning and anything between?
Making a quick search on the web for face detection with Go, almost 100% of the returned results are C bindings to external libraries. Pigo is making an exception from this, since it is purely developed in Go, having in mind the casual Go developer. The reference implementation is written in C and is available here: https://github.com/nenadmarkus/pico. There is no need to install platform dependent libraries, no need to compile and build the giant, monolithic OpenCV package.
What are the benefits of using Pigo? Just to name a few of them:
- High processing speed
- No need for image preprocessing prior detection
- No need for the computation of integral images, image pyramid, HOG pyramid or any other similar data structure
- The face detection is based on pixel intensity comparison encoded in the binary file tree structure
- Fast detection of in-plane rotated faces
New let’s see what are the similarities and what are the differences between Pigo and other detection methods. Similar to the Viola Jones face detection algorithm, Pigo is still using cascade decision trees at all reasonable scales and positions, but the cascade classifier is in binary format. The role of a classifier is to tell if a face is present in current region or not. The classifier consists of a decision tree where the leaves or internal nodes contains the results of pixel intensity comparison test in binary format. The binary test can be expressed with the following formula:
\( bintest(R, \text{$x1$, $y1$, $x2$, $y2$}) = \begin{cases} 0, & \text{$R$[$x1$, $y1$]} \le \text{$R$[$x2$, $y2$]} \\ 1, & \text{otherwise}, \end{cases} \)where \(R\) is an image region and (\(x_i\), \(y_i\)) represents the normalized pixel location coordinates, which means that the binary test can be easily resized if needed.
Since the cascades are encoded into a binary tree, this means that in order to run the detection method the cascade classifier needs to be unpacked. In the end the unpacking method will return a struct which has the following elements:
Due to many regions present in the image, the decision trees are organized in cascading classifiers, making each member of cascade to be evaluated in \( O(1) \) time with respect to the size of the region. An image region is considered being face if it passes all the cascade members. Since this process is limited to a relatively small number of regions, this gains high computation speed.
The above method will classify the cascade trees based on the trained data, but since many of them are in-plane faces, this means that rotated faces are not detectable. For this reason we need to introduce another method, which classifies the regions based on the rotation angle provided as input. (I'm not including the code snippet for this one, since you can check it on the source code.)
Another key aspect of the algorithm is that during the decision tree scanning, each detection is flagged with a detection score. An image region is considered being face if the detection score average is above a certain threshold (in general around 0.995). All regions below this threshold are not considered to be faces. We can achieve different ratios of true positives to false positives by varying the threshold value. Since the detector is based on pixel intensity comparison, this means that it’s also sensible to small perturbations and variations of the underlying pixel data, influenced mostly by the scaling and the rotation of the objects, resulting overlaps in detections.

The detection results without the clustering applied
This is the reason why the cascade detections are clustered together in a post processing step and the final result is produced by applying the intersection over union formula on the detected clusters.
In return this does not provide the rectangle coordinates of the detected faces as expected, but a slice of Detection struct consisting of number of rows and columns, the scale factor and the detection score. To translate from these to the standard image.Rectangle is only a matter of a simple conversion realized as in the following lines:
And this is how the final output looks like after the detection results have been clustered.

The detection results with the clustering applied
Pigo and GoCV comparison
The best way to compare the two libraries is to measure them both in terms of pure performance, detection speed but also accuracy. The most obvious way to evaluate them is to run some benchmarks with the same prerequisites. One thing to note is that the classifier is set to detect faces on the same image over and over again. This is to get an accurate idea of how well the algorithm performs.
To have a more accurate benchmark and to measure only the execution time the b.ResetTimer() is called to reset the timer so the setup is not counted towards the benchmark.
Here are the results:
For the above test we were using a sample image with a Nasa crew of 17 persons. Both of the libraries have returned exactly the same results, but Pigo was faster and also the memory allocation was way less compared to GoCV.
Use cases
To demonstrate the real time capabilities of the Pigo face detection library and also to show how easily could be integrated into let’s say a Python project I have created a couple of use cases, targeting different kinds of applications. The first one is the usual face detection example: real time, webcam based face detection, marking the detected faces with a rectangle (or circle).
Using Pigo as a shared object library
Go running in Python? Yes, that’s true: we are harvesting the Go feature to export binary files as shared objects. The Go compiler is capable of creating C-style dynamic shared libraries using build flag -buildmode=c-shared. Running the go program with the following flag will generate the shared object library which later on can be imported into the Python program. But the following conditions must be satisfied:
- The exported function should be annotated with the //export
statement . - The source must import the pseudo C package.
- An empty main function should be declared.
- The package must be a main package.
Knowing the above conditions we can execute a shell command from the Python program which in the end will call the shared object library returning the detection results. Later on we can operate with the values obtained. Below is an example of the process just described, whose source code and other examples can be found on the project examples directory: https://github.com/esimov/pigo/tree/master/examples.
Another handy application I have created is to blur out the detected faces. For static images we can lean on stackblur-go library to blur out the detected faces, otherwise if we are using as a shared library, which is getting imported into a Python program, then we can make use of OpenCV blur method.
Some consistent improvements of Pigo real time face detection capabilities paired with a face masking use case example. #golang #python #MachineLearninghttps://t.co/eRahkqjfao pic.twitter.com/CgDdNpLpdv
— Endre Simo (@simo_endre) March 17, 2019
I have also successfully integrated Pigo into Caire, the content aware image resizing library I have created. Thanks to Pigo it was possible to avoid the face distortions by restricting the seam removing algorithm only to the picture zones without faces. Once we've detected the faces it was only a piece of cake to exclude them from the processing. For more information about Caire read my other blog post, where I've detailed in large how the seam carving algorithm is working.
Serverless integration
Pigo has been successfully integrated into the OpenFaaS platform, easing you out from all the tedious work requested by the installation, configuration of the Go language etc., making possible to expose it as an FaaS function. This means once you have an OpenFaaS platform installed on your local machine with only two commands you have a fully working docker image where Pigo can be used as a serverless function.
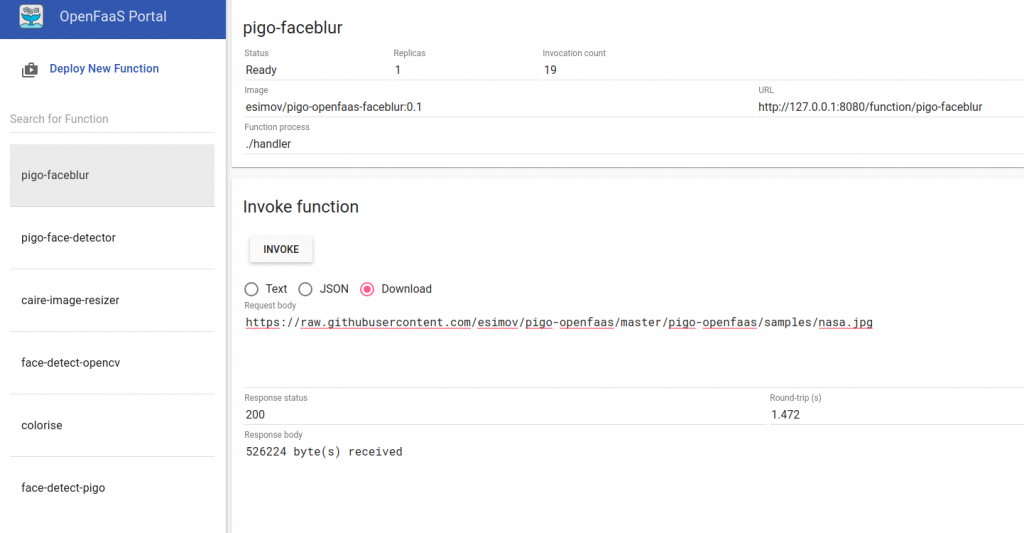
The OpenFaaS user interface
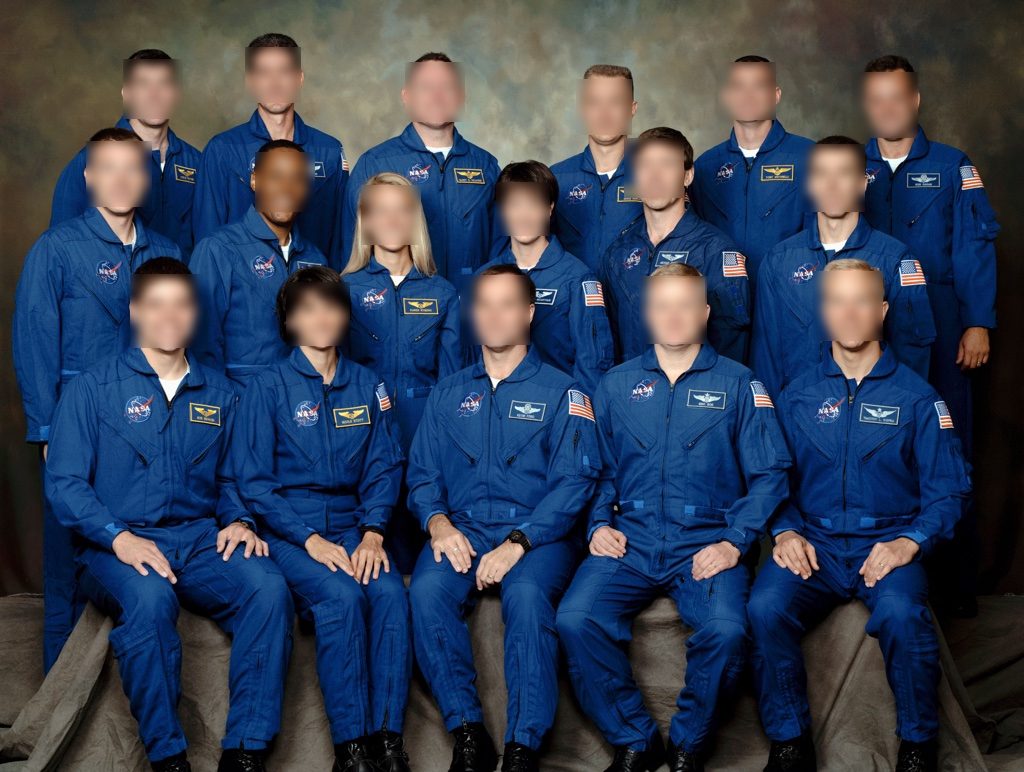
The faceblur function applied over an input image
Below are some of the OpenFaaS functions i have created integrating Pigo:
https://github.com/esimov/pigo-openfaas-faceblur
https://github.com/esimov/pigo-openfaas
The docker image is also available on the docker hub, having already more then 10k+ downloads. https://cloud.docker.com/u/esimov/repository/docker/esimov/pigo-openfaas
Summary
In conclusion as you might realize Pigo is a lightweight, but full fledged face detection library, easy to use and easy to integrate into different platforms and environments, having a simple API, but well enough for making the job done.
For more computer vision, image processing and creative programming stuffs you can follow me on twitter: https://twitter.com/simo_endre